
About mid-April, the Azure Container Apps team announced a public preview of a new hosting plan and pricing structure for hosting your Container Apps. By default, there was a Serverless consumption hosting plan which you can use to host your Container Apps. This provided support for scale-to-zero scenarios and you’d only pay for resources that your application would use.
With the Dedicated hosting plan now in preview, you still have the option of having a fully managed environment for hosting your Container Apps with scale-to-zero capabilities, but in addition to this you can also run applications with customized hardware using Dedicated workload profiles.
In this blog post, I’ll dive into the details of dedicated workload profiles, what types of workload profiles that are available to us, what features come with dedicated workload profiles and how we can provision a dedicated workload profile in the Azure portal. (You can also deploy a Dedicated workload profile environment using the AZ CLI, but no support for Bicep yet!)
At the time of writing, this feature is currently in preview! That means features could change once it becomes generally available, so I’ll do my best to keep this article up-to-date (or give it a rewrite should it be required).
Let’s dive in!
Consumption vs Consumption + Dedicated plans
Before the preview hosting plan was released, you could only provision serverless Container App environments. With the ability to provision dedicated workload profiles alongside serverless workloads, we can use different workload profiles in our environments.
Depending on your application requirements, you can provision the following workload profiles:
- Consumption - This is for apps that don’t need specific hardware to run. Since these are currently the default for Container App environments, consumption profiles are automatically added to any new environment.
- Dedicated General purpose - These profiles provide a balance of memory and compute resources (hence the word general purpose). These profiles are for your applications that need larger amounts of CPU and/or memory.
- Dedicated Memory optimized - These profiles provide greater memory resources which is ideal for applications that need large in-memory data, use in-memory ML models or other high memory requirements.
Now by default, the consumption workload profile is automatically added to all Consumption + Dedicated plan environments that we create. We can choose to add dedicated workload profiles as and when we need to after our environment is created, which gives us some flexibility when it comes to provisioning our environments.
With any preview service, there are limitations (again, going to use the ’time-of-writing’ caveat I mentioned earlier to say that these will change when the feature goes GA). Currently, these are the regions that support workload profiles:
- North Central US
- North Europe
- West Europe
- East US
On top of that, the types and sizes of workload profiles differ by region.
When would you use Dedicated workload profiles?
Much like Consumption plans, you can scale your applications to zero, and you only pay for the apps that run. Alongside the serverless workload profile, you provision a dedicated workload profile that provides dedicated hardware that your apps run from. As mentioned above, these consists of either general purpose or memory optimized profiles. Instead of paying per app that you run, you pay per node that you provision (these can also scale in and out as the demand for your application changes).
The combination of Consumption and Dedicated plan structures enable you to run apps that scale to zero that don’t need to be run on specific hardware and it provides you with the ability to secure outbound traffic using user-defined routes (UDR) with Azure Firewall or NAT gateway integration (both in preview).
Dedicated plans provide environment isolation, which comes with single tenant guarantees (meaning that you’re not sharing your environment with other Azure customers). You also have more granular control of how much compute your environment needs. You can deploy your apps to each workload profile, choose what type and size your dedicated workload profile needs to be for those apps and scale in and out as more apps are added/removed.
For the finance folks/software architects who need to keep costs down, dedicated workload profiles also provide cost controls by allowing you to set minimum and maximum limits for your scaling. With Serverless compute options, these scale (and are charged) based on events and costs may exceed your expected cost limits due to your application processing more events than expected!
Provisioning a Dedicated workload profile Container App Environment
Let’s deploy a Container App environment with a dedicated workload profile. We’ll do this through the portal (yeah I know, ClickOps) to see what options are available to us. When we create a new Container Apps environment, we’ll want to make sure that we choose the Consumption and Dedicated workload profiles (as shown below):

We’ll need to give our environment a name and ensure that we deploy it to a supported location (Listed above). Once we do that, we’ll see an option to add an workload profile. As mentioned earlier, the Consumption workload is added by default. Click on Add workload profile to add a new dedicated workload profile.

From here, we’ll need to give it a friendly identifiable name and choose a profile size. We can also set the minimum and maximum autoscaling instance count range for our workload profile.

Different sizes and types of workload profile sizes will be available to us depending on the Azure region we deploy our environment to. From the diagram below, you can see that you can choose from either general purpose workload profiles or memory optimized profiles, which have different CPU and Memory limits. I’m just using General purpose D4 for the purposes of this tutorial, but take the time to assess your application requirements and pick a profile that will suit the demands of your app.
Remember, you can add and/or delete workload profiles at any time, so you can always provision another workload profile should your Container Apps require it.

See how much the profiles cost? After this tutorial, make sure you clean up all resources that you don’t use! If you want to burn a hole in your credit card, I’m not taking any responsibility for it! 😂
Once you’ve chosen your workload profile size, you can configure monitoring and networking resources for your environment. I’ve omitted that for simplicity for now, so once everything is configured, you should see your new environment set up and you can continue to provision your container apps.

Once we’ve deployed our environments, we’ll be able to view the workload profiles that are currently provisioned to this environment in the Workload profiles (Preview) tab under Settings.
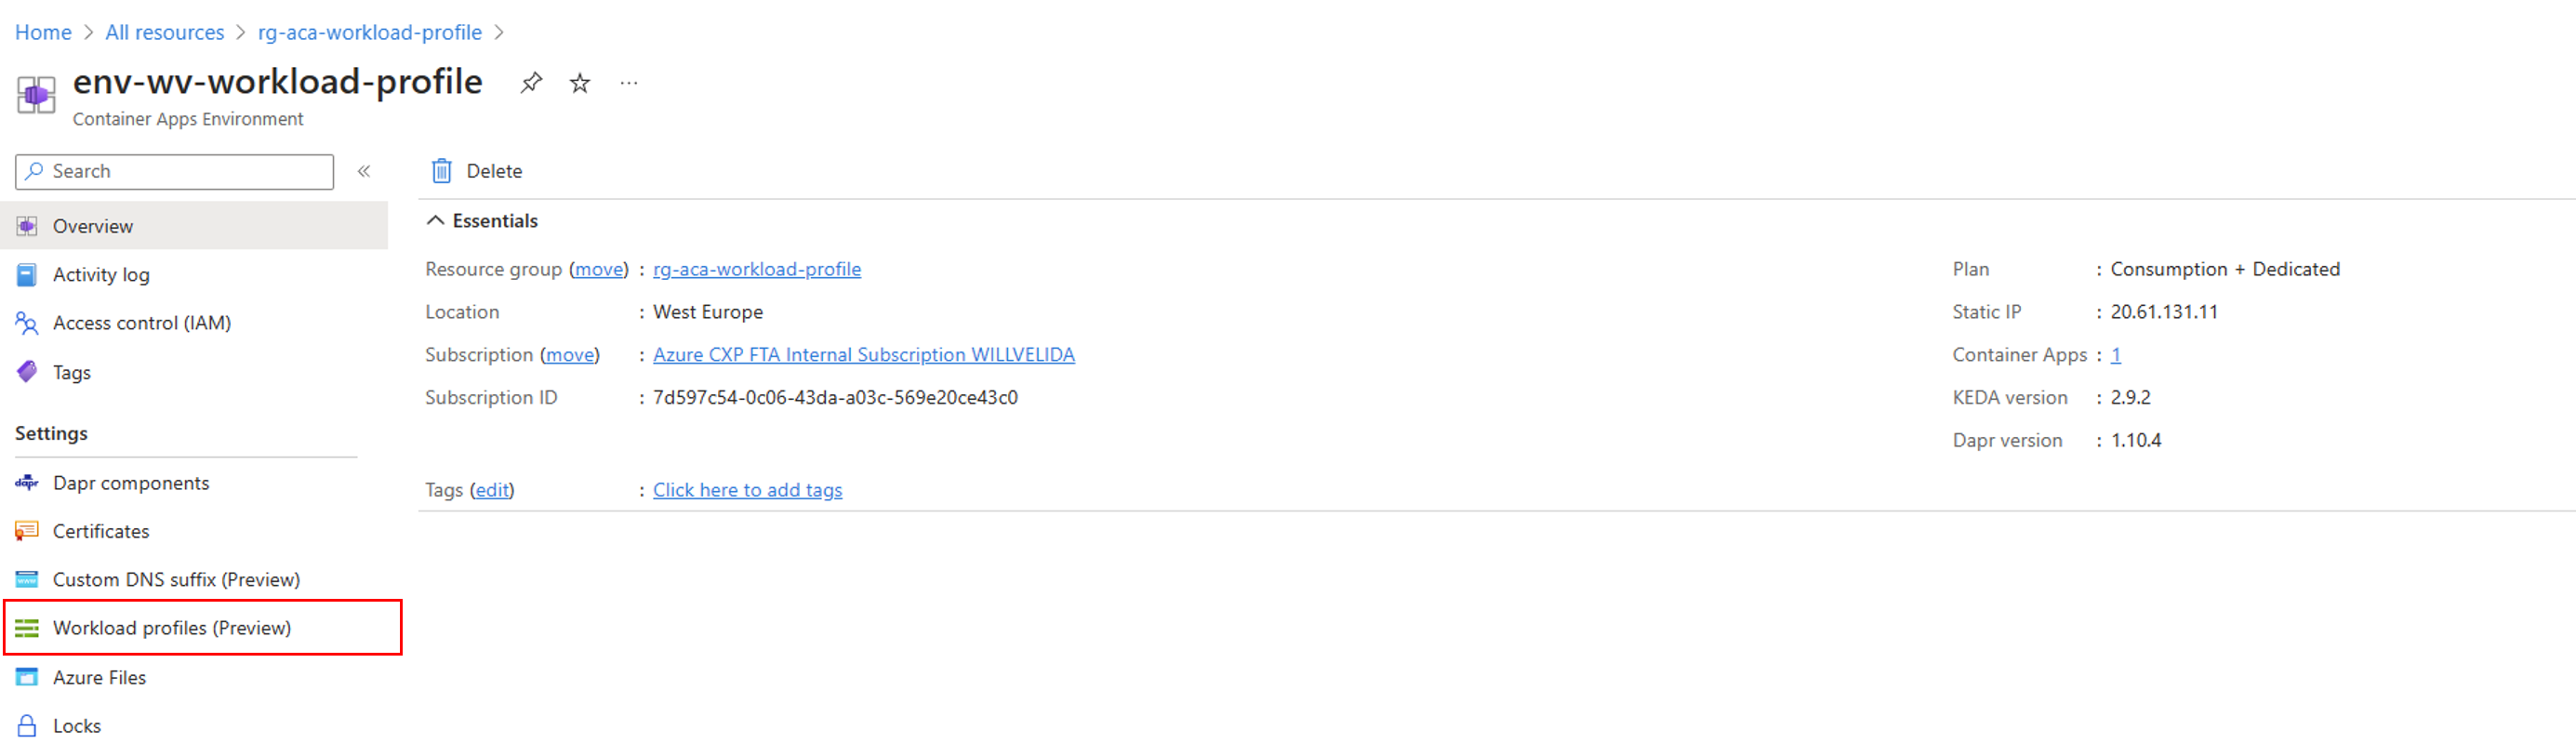
From here, we can see what workload profiles are currently deployed to this environment, how many instances are active in the profile, how many apps are currently deployed to that profile and we can change the minimum and maximum number of nodes in our profile.

Conclusion
I’m really excited about dedicated workload profiles for Container App environments. The pre-existing serverless environments did have their limitations around CPU and Memory constraints, but with dedicated workload profiles, it opens up a lot of potential scenarios for hosting Container Apps that need dedicated hardware.
I’m also glad to see that you can provision serverless and dedicated workload profiles together within the same environment, as that provides us as developers with flexibility as to how we host our Container Apps.
This feature is still in preview, so expect new features, workload profile sizes and more regions to be available once this feature goes GA. No, I don’t have any timelines on when that will be either!
For more information about Consumption + Dedicated workload profiles for Container App environments, check out the following:
- Workload profiles in Consumption + Dedicated plan structure environments in Azure Container Apps
- Azure Container Apps plan types
- Manage workload profiles in a Consumption + Dedicated workload profiles plan structure
As always, if you have any questions, feel free to reach out to me on twitter @willvelida
Until next time, Happy coding! 🤓🖥️