Almost a year ago, I wrote a blog post on how you could use GitHub Models with Semantic Kernel applications for dev and test purposes. Now that the Microsoft Agent Framework is available, I thought I’d create an updated article on how you can use GitHub Models with the new framework, so that you don’t have to provision Azure Foundry and pay for using LLM usage to build agents.
What is the Microsoft Agent Framework?
It’s an open-source kit for building AI Agents and agentic workflows in Python and C#. The Agent Framework is an extension of both Semantic Kernel and AutoGen projects, and it provides a unified approach for building agents. Both the Semantic Kernel and AutoGen teams are working together to build the Microsoft Agent Framework.
The framework allows you to build both AI Agents and workflows. AI Agents being the individual agents that use LLMs to process user inputs, call tools and MCP servers to perform actions, and generate responses, while workflows connect multiple agents and functions to perform complex, multi-step tasks.
What are GitHub Models?
GitHub models is a workspace within GitHub that helps lower the barrier of entry to building applications with LLMs. It provides tools to test LLMs, refine prompts, evaluate outputs, and make decisions on which LLMs to use based on metrics.
Essentially, if you don’t want to pay money just to test which LLM your agent should use, GitHub Models is the best way to do that. Obviously, since it’s free, there are limits to how much you can use them.
Generating a PAT token to use GitHub Models
To use GitHub Models, we’ll need to generate a GitHub Personal Access Token. Within the GitHub Models marketplace, we can choose the model that we want to use and generate our token from there.
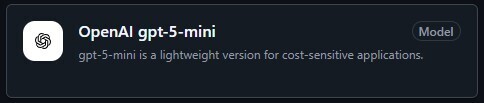
For this demo, I’ll use OpenAI’s gpt-5-mini model. Either scroll down to find it, or set the Publisher drop-down to Azure OpenAI Service
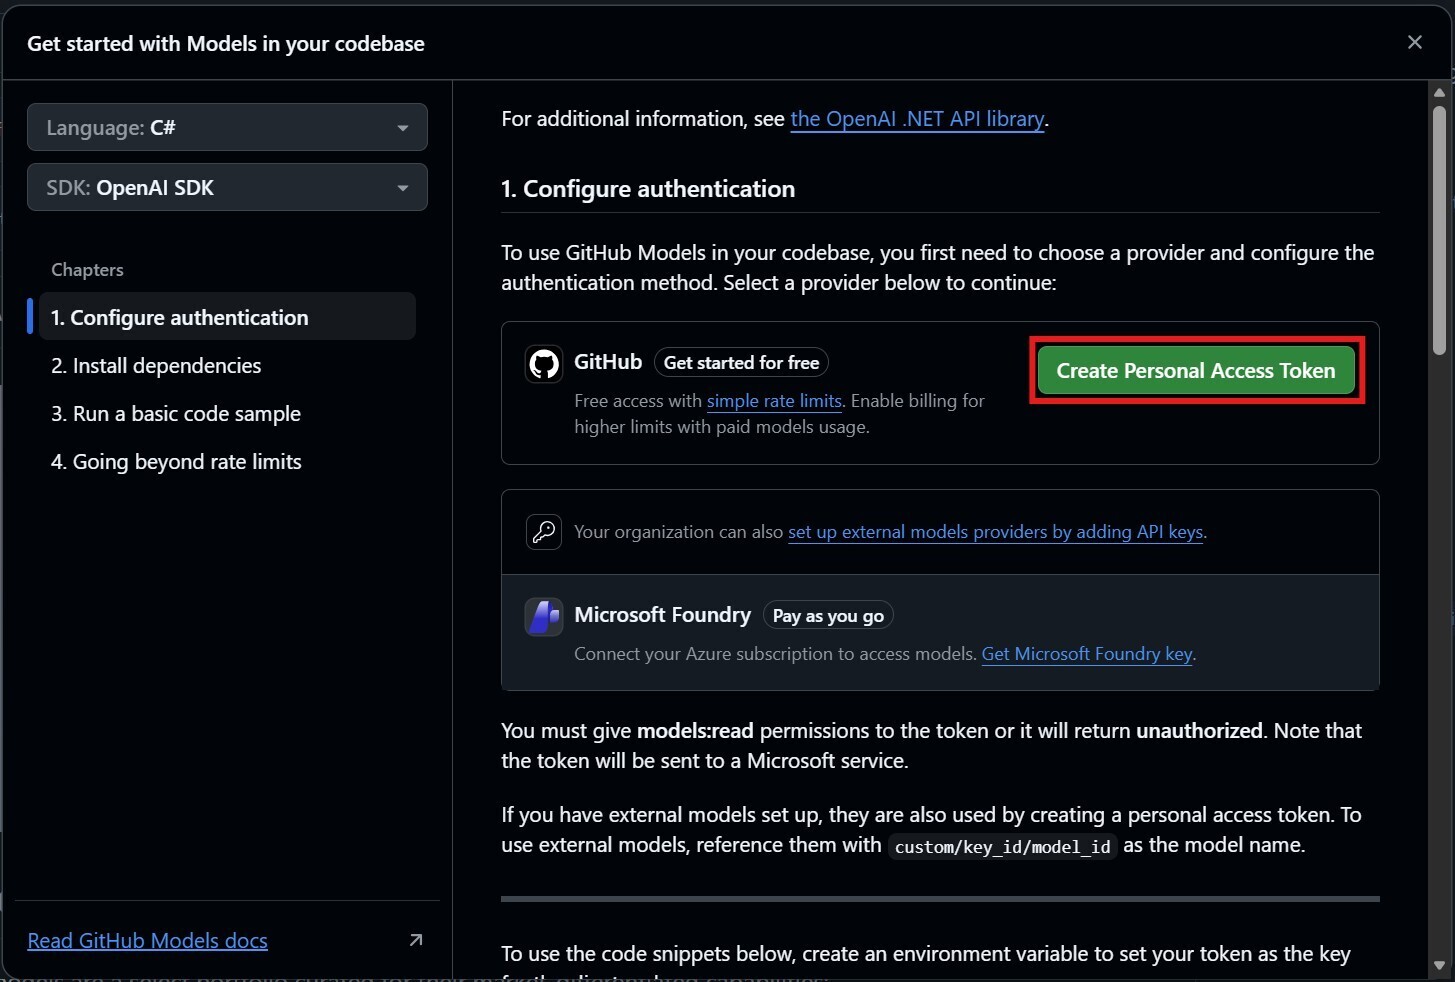
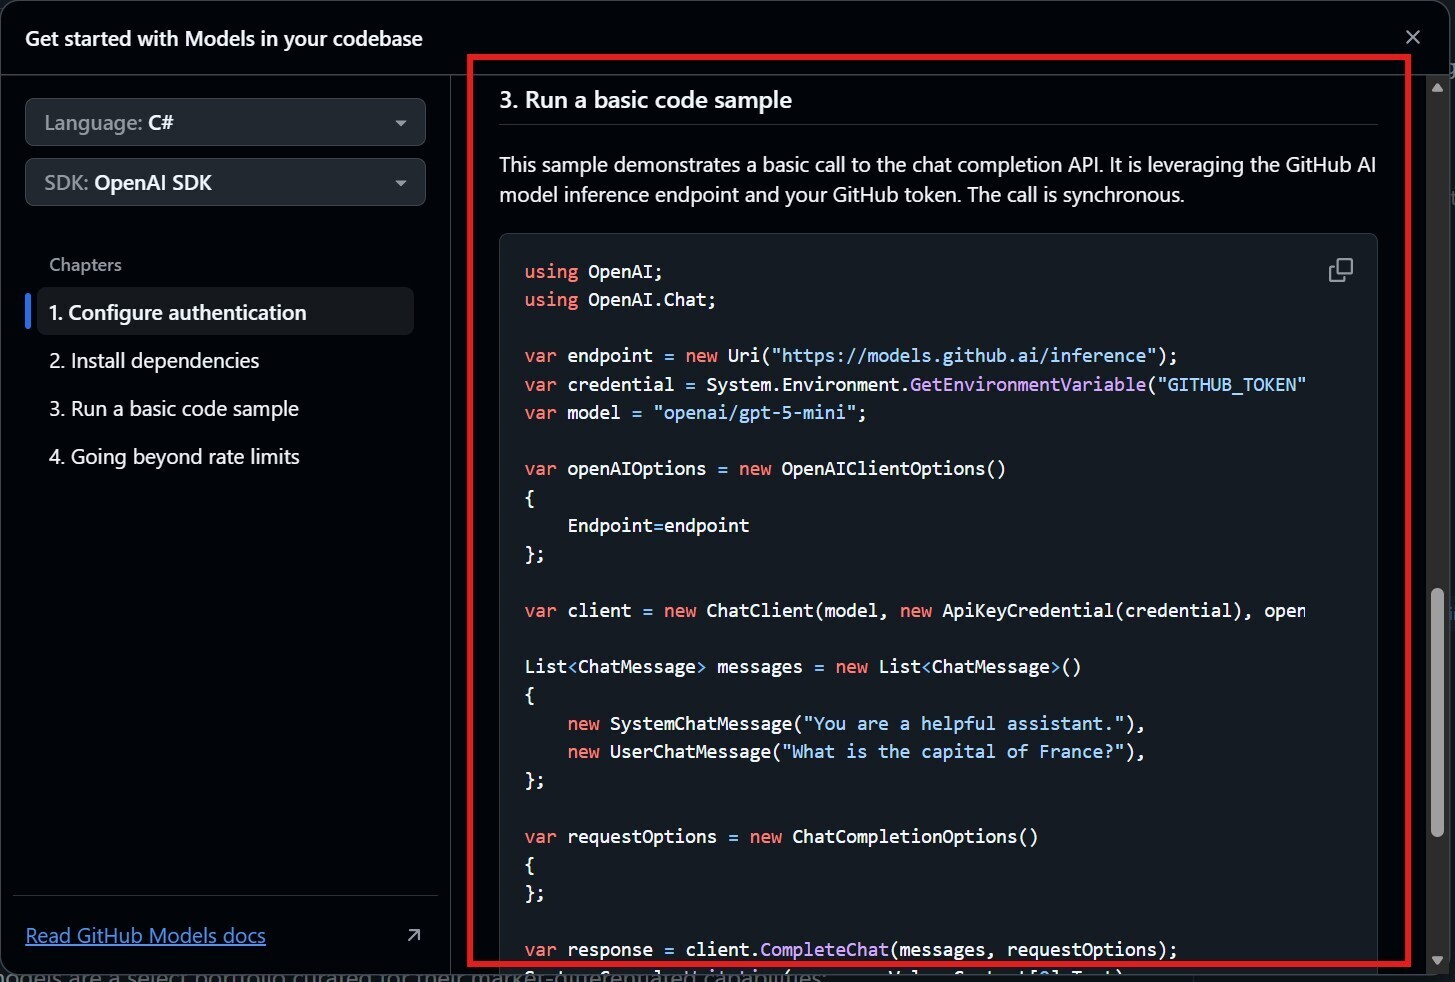
Click on Use this model and a dialog should show up. In this dialog, you should see how we can configure authentication so that we can use the model, which dependencies to install (specific to which language you are using), how to run a basic code sample, and how to go beyond the limits.
For now, click on Create Personal Access Token. I’d open a new tab, just so we can refer to the dialog later.
You’ll have to verify your GitHub credentials again, but once you’ve done that, you’ll be able to generate a PAT token. This experience has improved since the last time I used this, as the minimal permissions have already been set up for us.
In order to use GitHub Models, you’ll need to generate a PAT token that has Read-only permissions over the Models scope. Click on Generate token to generate the token.
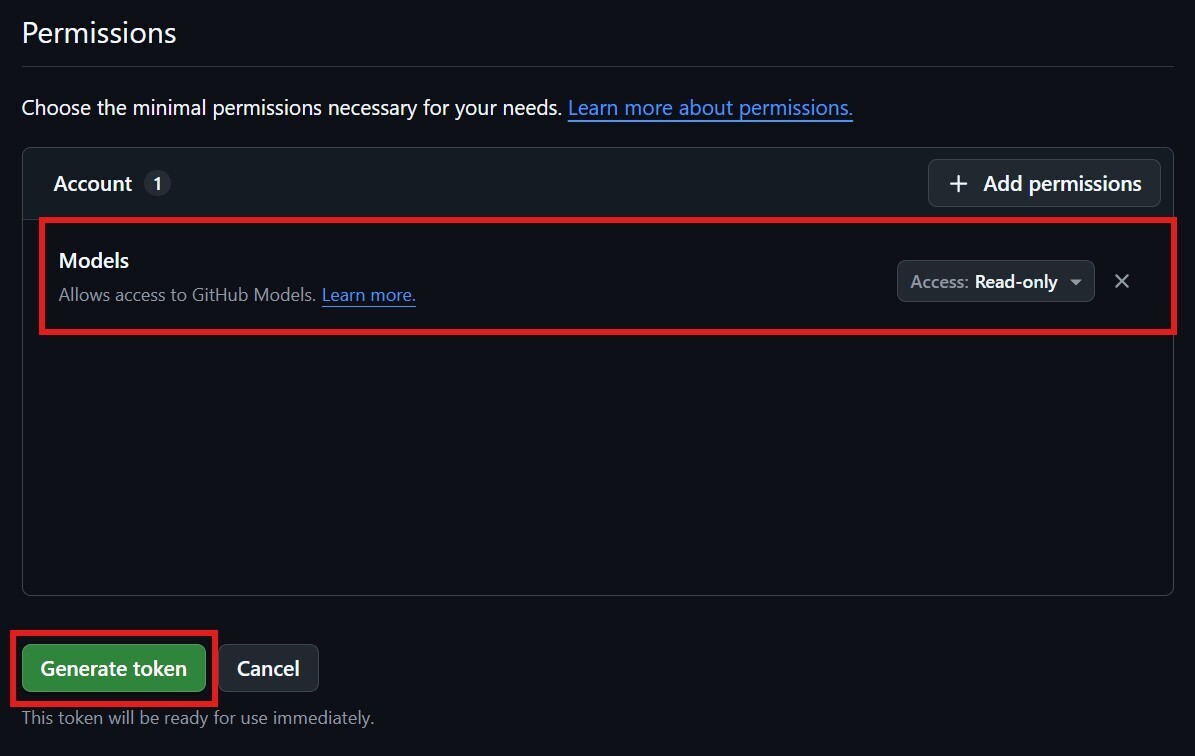
This will create the PAT token, which you should copy as you won’t be able to see it again after you navigate away from GitHub.
Creating our Agent
Now that we have a PAT token, we can create our Agent. For this, I’m just going to create a C# console application. Once the console app has been created, we can use User Secrets to set the GitHub PAT Token as secret that our agent can use.
dotnet user-secrets init
dotnet user-secrets set "GH_PAT" "<your-PAT-token>"
Then within our console application, we can load User Secrets into our configuration like so:
var config = new ConfigurationBuilder()
    .AddUserSecrets<Program>()
    .Build();
To use the Microsoft Agent Framework, we’ll need to install the following packages using the CLI:
dotnet add package Microsoft.Agents.AI.OpenAI --prerelease
From here, we can create our Agent to use the LLM from GitHub Models. First, we’ll need to set the following variables:
var endpoint = new Uri("https://models.github.ai/inference");
var model = "openai/gpt-5-mini";
var githubPAT = config["GH_PATH"];
Why these variables? Back in the GitHub Models, it’ll show you a code sample on how to use the model. This agent uses a Chat Completion service that implements the IChatClient interface. With Azure OpenAI, this would be through the AzureOpenAIClient, but since we’re using an LLM from GitHub Models, we’ll use the OpenAI ChatClient instead.
Alongside our variables, we should configure our OpenAIClientOptions to point the endpoint to our variable. We can do this like so:
var openAIOptions = new OpenAIClientOptions()
{
    Endpoint = endpoint,
};
As part of the Agent Framework, we can use OpenTelemetry so that interactions with our agents can be logged and exported. We’ll just output these to the console for now using the OpenTelemetry console exporter.
To do this, we need to install the following NuGet packages:
dotnet add package OpenTelemetry
dotnet add package OpenTelemetry.Exporter.Console
Then we can create a OpenTelemetry TracerProvider that exports logs to the console:
using var traceProvider = Sdk.CreateTracerProviderBuilder()
    .AddSource("agent-telemetry-source")
    .AddConsoleExporter()
    .Build();
To create the agent, we create the ChatClient to use our model from GitHub Models. We’ll need the model, the GitHub PAT Token for our ApiKeyCredential, and the openAIOptions to ensure we’re pointing to our model endpoint correctly.
From there, we can create our AI Agent with its name and instructions and then use our OpenTelemetry configuration to configure instrumentation for our agent.
AIAgent agent = new ChatClient(model, new ApiKeyCredential(githubPAT), openAIOptions)
                    .CreateAIAgent(instructions: "You are a fitness expert", name: "GymBrah")
                    .AsBuilder()
                    .UseOpenTelemetry(sourceName: "agent-telemetry-source")
                    .Build();
Running our Agent
Now that our agent has been set up, let’s have some fun and run it! Let’s test how we can run the agent in a multi-turn conversation and then persist conversations to storage and reload that into our conversation.
Agents are stateless, meaning that they do not hold any state between calls. In order for them to do so, we’ll need to create an object to hold the conversation state and pass this to the agent when we run it.
We can do this by creating a new thread on our agent instance.
AgentThread agentThread = agent.GetNewThread();
We can then pass the thread to the RunAsync method when calling the agent like so:
Console.WriteLine(await agent.RunAsync("Give me 3 stretches for hip flexors", agentThread));
Console.WriteLine(await agent.RunAsync("Now give me 3 stretches for my hamstrings", agentThread));
Once conversations are added to the thread, we can call the Serialize method on the thread to serialize it to a JsonElement, which we can convert to a string to save it to a database, blob storage, or in this case, our local file system:
string serializedConversation = agentThread.Serialize(JsonSerializerOptions.Web).GetRawText();

string filePath = Path.Combine(Path.GetTempPath(), "conversation.json");
await File.WriteAllTextAsync(filePath, serializedConversation);
We can then load the persisted JSON from storage and recreate the AgentThread instance from it. Take care to use the same agent type that was used when creating the original thread, as agents might have their own thread types that are specific to that agent.
string loadedConversation = await File.ReadAllTextAsync(filePath);
JsonElement reloadedConversation = JsonSerializer.Deserialize<JsonElement>(loadedConversation, JsonSerializerOptions.Web);

AgentThread resumedThread = agent.DeserializeThread(reloadedConversation, JsonSerializerOptions.Web);
From here, we can resume our conversation with the agent using the resumed thread.
Console.WriteLine(await agent.RunAsync("Based on those stretches, give me a 3-day stretching plan that uses just those exercises", resumedThread));
Let’s run the agent using dotnet run to see how our agent behaves.
With telemetry configured, we should see agent invocation traces shown first like so:
Activity.TraceId:            518ebe3708c606320262f6a3e5a766a0
Activity.SpanId:             4d3c146a86bcc90a
Activity.TraceFlags:         Recorded
Activity.DisplayName:        invoke_agent GymBrah(58d381f1d9574d709b4a962e19009fd3)
Activity.Kind:               Client
Activity.StartTime:          2026-01-09T04:28:45.3842007Z
Activity.Duration:           00:00:11.5715496
Activity.Tags:
    gen_ai.operation.name: invoke_agent
    gen_ai.request.model: openai/gpt-5-mini
    gen_ai.provider.name: openai
    server.address: models.github.ai
    server.port: 443
    gen_ai.agent.id: 58d381f1d9574d709b4a962e19009fd3
    gen_ai.agent.name: GymBrah
    gen_ai.response.finish_reasons: ["stop"]
    gen_ai.response.id: chatcmpl-CvyP9nllHnZMVsxQKFI2cnrA8takf
    gen_ai.response.model: gpt-5-mini-2025-08-07
    gen_ai.usage.input_tokens: 24
    gen_ai.usage.output_tokens: 1070
Instrumentation scope (ActivitySource):
    Name: agent-telemetry-source
Resource associated with Activity:
    telemetry.sdk.name: opentelemetry
    telemetry.sdk.language: dotnet
    telemetry.sdk.version: 1.14.0
    service.name: unknown_service:BasicAgent
Here we can see information like what LLM was used, where it’s hosted, and why the agent finished the task.
After that, we should see a response from the agent:
Here are three effective hip-flexor stretches, with how to do each, cues, and safety tips.

1) Half-kneeling (low lunge) - posterior pelvic tilt version
- How: Start in a half-kneeling position (one knee on the floor, other foot planted forward so front knee is over the ankle). Keep torso upright, squeeze the glute of the back leg, and gently tuck your pelvis under (posterior pelvic tilt) to lengthen the front of the hip.
- Hold: 30-60 seconds, 2-3 sets per side.
- Cues: Keep hips square (don't rotate), avoid overarching the lower back - the stretch should be felt deep in the front of the hip/groin area, not in the low back. Breathe steadily.
- Modifications: Use a cushion under the back knee for comfort; if mobility is limited, move the front foot slightly forward to reduce intensity.

/// Rest of response
Complete Agent code
The finished code for our agent should look like this:
using Microsoft.Agents.AI;
using Microsoft.Extensions.Configuration;
using OpenAI;
using OpenAI.Chat;
using OpenTelemetry;
using OpenTelemetry.Trace;
using System.ClientModel;
using System.Text.Json;

var config = new ConfigurationBuilder()
    .AddUserSecrets<Program>()
    .Build();

using var traceProvider = Sdk.CreateTracerProviderBuilder()
    .AddSource("agent-telemetry-source")
    .AddConsoleExporter()
    .Build();

var endpoint = new Uri("https://models.github.ai/inference");
var model = "openai/gpt-5-mini";
var githubPAT = config["GH_PATH"];

var openAIOptions = new OpenAIClientOptions()
{
    Endpoint = endpoint,
};

AIAgent agent = new ChatClient(model, new ApiKeyCredential(githubPAT), openAIOptions)
                    .CreateAIAgent(instructions: "You are a fitness expert", name: "GymBrah")
                    .AsBuilder()
                    .UseOpenTelemetry(sourceName: "agent-telemetry-source")
                    .Build();

AgentThread agentThread = agent.GetNewThread();

Console.WriteLine(await agent.RunAsync("Give me 3 stretches for hip flexors", agentThread));
Console.WriteLine(await agent.RunAsync("Now give me 3 stretches for my hamstrings", agentThread));

string serializedConversation = agentThread.Serialize(JsonSerializerOptions.Web).GetRawText();

string filePath = Path.Combine(Path.GetTempPath(), "conversation.json");
await File.WriteAllTextAsync(filePath, serializedConversation);

string loadedConversation = await File.ReadAllTextAsync(filePath);
JsonElement reloadedConversation = JsonSerializer.Deserialize<JsonElement>(loadedConversation, JsonSerializerOptions.Web);

AgentThread resumedThread = agent.DeserializeThread(reloadedConversation, JsonSerializerOptions.Web);

Console.WriteLine(await agent.RunAsync("Based on those stretches, give me a 3-day stretching plan that uses just those exercises", resumedThread));
Bear in mind that at the time of writing this blog (9th January 2026), the Microsoft Agent Framework is in preview, so expect APIs to change!
Conclusion
Hopefully this article helps simplify using LLM models when you’re developing agents using the Microsoft Agent Framework. GitHub Models is a great way to develop agents without having to spend money on Azure Foundry. Just be mindful of limits when you’re using it!
If you have any questions about the content here, please feel free to reach out to me on BlueSky or comment below.
Until next time, Happy coding! 🤓🖥️